

Index
- Understanding Color Theory for Matching Dyes
- L importance of fiber composition
- Dye sampling testing: the fundamental step
- Create custom color formulas
- The role of color fixing on fabrics: vinegar and salt
- How to fix a wrong color on fabric
- Factors that influence the final color result
- Frequently Asked Questions
Last updated: August 16, 2026
Understanding Color Theory for Matching Dyes
Color theory is the foundation of all successful textile dyeing. Anyone who wants to accurately match fabric colors must first understand how these colors interact with fiber. Aybel has helped thousands of people transform faded garments into brilliant dresses precisely because our customers first learned to understand color.
How the color wheel works
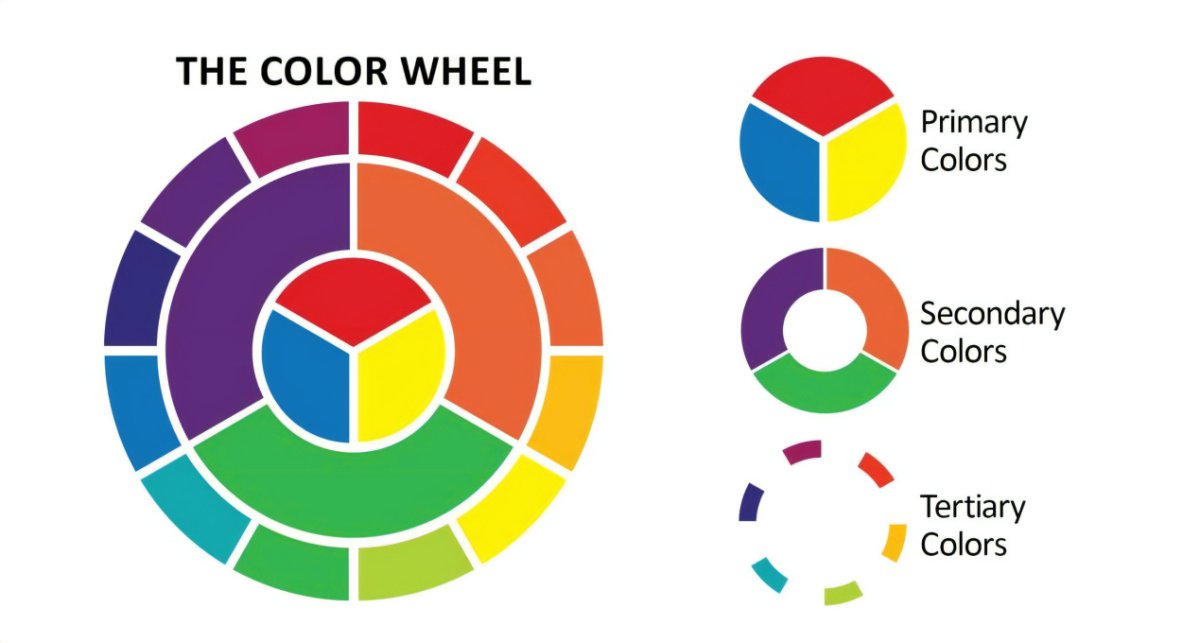
The color wheel organizes colors based on their harmonious relationships. The primary colors (red, yellow, blue) are positioned at equal distances, and all other colors are derived from them through mixing.
Opposite (complementary) colors create maximum contrast. For example, blue and orange are directly opposite each other. If you've dyed a garment too intensely blue and want to bring it to a more neutral tone, adding a touch of orange might be the solution. Adjacent colors on the color wheel (like blue and blue-green) create natural harmonies that work well for smooth transitions between different shades.
Primary, secondary and tertiary colours in dyeing
The primary colors (red, yellow, blue) are the three pure colors from which all other colors are theoretically derived. If you have dyes in the three primary colors, you can create virtually any shade by mixing them in different proportions.
Secondary colors (green, orange, purple) are created by mixing two primary colors. Tertiary colors are created by mixing a primary color with a secondary one. When you're trying to match fabric dyes on different garments, you're often not looking for a pure primary color, but a tertiary shade. Understanding how to achieve this through mixing allows you to replicate almost any hue you desire.
L importance of fiber composition
Not all fibers absorb dye equally. Fabric composition is the second critical factor in determining how the final color will appear on your garment.
Natural fibers like cotton, wool, and silk have a chemical structure that allows dye molecules to penetrate deeply into the fiber itself. Synthetic fibers like polyester generally don't accept reactive dyes in the same way. If your garment is 100% polyester, the dye may not take hold at all.
Fiber blends present a special case. A garment made of 70% cotton and 30% polyester will have a color that reflects this composition: the cotton will absorb the color intensely, while the polyester will not.
Dye sampling testing: the fundamental step
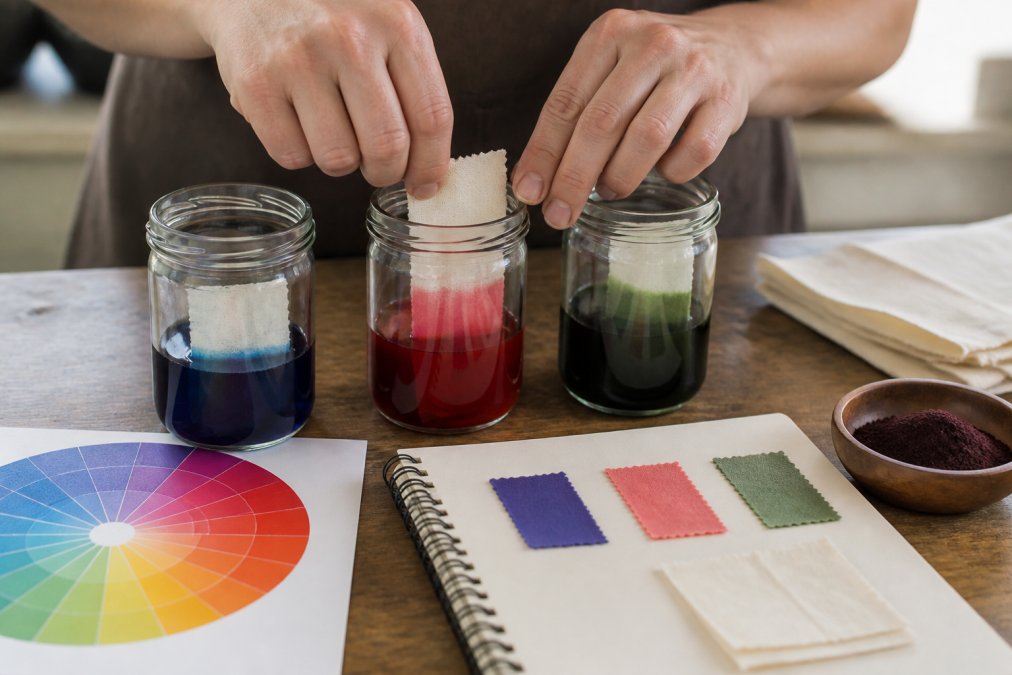
The sample test is the step most beginners skip and then regret. A small sample provides crucial information before subjecting the entire garment to the dye bath.
How to prepare tissue samples
Cut small pieces (about 10x10 centimeters) from the same fabric you are dyeing. Prepare your dye bath exactly as you would for a full garment, but on a smaller scale. If the recipe calls for 500 milliliters of water and a sachet of dye, for a sample, use 50 milliliters of water and one-tenth of a sachet. Soak the sample in the bath for the same amount of time you would for a full garment.
Hue and saturation evaluation
Once the sample has been dyed and dried, evaluate it under natural light. Artificial light can be deceiving: a shade that looks perfect under your home lights may look completely different in sunlight.
Consider two aspects: the hue (the actual color) and the saturation (how intense the color is). If the hue is correct but the color is too light, you'll need to increase the dye concentration or extend the soaking time. If the color is too dark, you'll need to reduce the amount of dye. Keep these dyed samples as a reference for the final color.
Create custom color formulas
Once you understand color theory and have tested your samples, you're ready to create custom formulas . A formula is simply a recipe: the amount of each dye, the amount of water, the soaking time, and the temperature.
Mixing primary colors to create custom shades
If you want a specific color that doesn't exactly match any specific dye in your kit, you need to mix primary colors. Always start with small amounts and gradually increase. If you want a sage green (a green that leans toward gray or brown), you might start with blue and yellow, but also add a tiny amount of red. The red slightly neutralizes the green, creating the earthy tone you desire.
Record your formulas in a notebook
Keep a notebook dedicated to your formulas. For each shade, record:
- The date
- The type of fabric
- The weight of the fabric (in grams)
- The quantity of each tincture (in grams or number of sachets)
- The amount of water (in milliliters)
- The water temperature
- The immersion time (in minutes)
- The resulting color (and a photo if possible)
- Focus on what worked and what could be improved
Over time, this notebook will become your personalized manual. When a friend asks you how you created a color, you can consult your notebook and replicate the result exactly.
The role of color fixing on fabrics: vinegar and salt
Additives in the dye bath play a critical role in determining how well the color binds to the fiber. The most common additives are salt and vinegar.
How additives work in the dye bath
Salt (sodium chloride) acts as a fixative. When salt is added to the dye bath, the salt molecules interact with the dye molecules and fibers, facilitating the transfer of color from the solution to the fiber. L (acetic acid) lowers the pH of the dye bath, creating a more acidic environment. Together, salt and vinegar ensure that the color is deeply set in the fiber and the result is long-lasting.
Correct dosage and immersion times
For every liter of water in the bath, add about 10 grams of salt and 30 milliliters of vinegar. Many recipes suggest adding the salt at the beginning of the bath, while the vinegar is added later, after 10–15 minutes. Soaking times vary depending on the type of dye and fiber, but generally, allowing the fabric to soak for 30–45 minutes produces satisfactory results.
Temperature is another critical factor. Most reactive textile dyes work best at temperatures between 60°C and 85°C. If the water is too cold, the dye won't set well. If it's too hot, you risk damaging the fibers.
How to fix a wrong color on fabric
Despite all the planning and testing, sometimes the results aren't what you hoped for. The good news is that in many cases, the problem can be corrected.
Identify the problem: too dark, too light, or the wrong shade
If the color is too dark, the problem is usually that the dye concentration was too high or the soaking time was too long. If the color is too light, the opposite problem is present: not enough dye or not enough time. If the shade is completely wrong, the problem lies in the recipe itself.
Correction and re-dyeing techniques
If the color is too light, the simplest solution is to re-dye the garment. Prepare a new dye bath and immerse the garment in it again. If the color is too dark, one solution is to accept the dark color and use it as a base for a new project. If the shade is completely wrong, the complementary color (the opposite color on the color wheel) can help neutralize the unwanted hue.
Factors that influence the final color result
Even if you followed the recipe perfectly, the final color result may vary due to external factors.
Water quality and dyeing conditions
The quality of the water you use has a significant impact on the final color. Hard L (rich in minerals like calcium and magnesium) can interfere with the dyeing process, producing paler colors. If you live in an area with very hard water, you may want to consider using distilled or filtered water.
Water temperature is crucial. Even a 5-10°C variation can affect how well the color sets. Use a thermometer to monitor the temperature throughout the process.
Lighting for accurate color assessment
Color is a visual perception that depends on light. The same dyed fabric may appear completely different under sunlight, under fluorescent lights at home, or under incandescent lamps.
To accurately assess the final color, always view the fabric in natural light. When recording your results in your dyeing notebook, take photographs in natural light. These photos will become your most accurate visual reference for reproducing that color in the future.
Matching textile dye colors is a skill that develops with practice and documentation. Every garment you dye is an opportunity to learn. Aybel provides the dyes and additives you need, but true mastery lies in your understanding of color theory, careful preparation, and systematic testing. Start with our Tie-Dye Set 3 or Tie-Dye Set 4 if you want to experiment with more shades, and build your skills one garment at a time.


Frequently Asked Questions
What is vinegar used for when dyeing fabrics?
L acts as a natural fixative that helps fibers retain the dye's color. When you add vinegar to the dye bath, its acidic pH promotes the absorption of the dye into natural fibers like cotton, silk, and wool. This means the color will remain more vibrant and long-lasting after washing. L is particularly effective for acid dyes and is an economical and sustainable solution compared to chemical fixatives.
How to test the color before dyeing the entire garment?
A sample test is essential to avoid disappointment. Cut a small piece of fabric identical to the one you want to dye, prepare the dye bath exactly as you would for the entire garment, and soak the sample for the same amount of time. Let the sample dry completely in natural light, as wet color looks different than dry color. Evaluate the hue, saturation, and uniformity. If you're not satisfied with the result, adjust the dye concentration or soak time before proceeding with the entire garment.
Why is the dye color not uniform?
L depends on several factors: insufficient movement during dyeing, unstable bath temperature, or uneven dye concentration. To achieve uniform color, stir the fabric regularly in the bath, maintain a constant temperature, and ensure the fabric is not too crowded. If you use a washing machine, choose the delicate cycle with hot water. The quality of the fabric and its composition also influence the result: natural fibers absorb color more easily than synthetic ones.
Can different fabric dyes be mixed together?
Yes, you can mix dyes to create custom hues, but it's important to do so methodically. Use the color wheel as a guide: mixing primary colors creates secondary colors, and further combinations produce tertiary hues. Start with small amounts and always record the proportions in a dyeing notebook. Mix dry dyes before adding them to the hot water bath, or prepare separate solutions and combine them in the bath. Aybel tie-dye sets offer pre-formulated colors for harmonious combinations.